What is the cheapest way to develop your colour negative film? Develop it as you would any black and white film!
It all stared when I bought too many rolls of expired Portra 400 just to find out that this film is useless for my photos (YES - I THINK PORTRA IS NOT THAT GREAT, EVEN WHEN NEW, and I'm not Anti-Kodak: I dig Tri-X and HC-110) I shot 1-maybe-2 rolls of this film just to find that the NC version looks very dull. so the 2 remaining rolls got abandoned in the freezer for another year. Finally I took one roll for a shoot just as a backup and shot it all in a couple of minutes just to see how it develops in B&W. But I didn't even have the fainstest idea how to do this. Here's how I worked it out!
If you're not interested in the story, but only in the formula for developing you can skip right away to the red block of text.
DEVELOPING
Nowadays there are numerous forum threads on this topic, but I couldn't find and solid information I could use at least as a reference point. When I was looking for any info a year ago there was even less google search results on the internet - but by some weird coincidence (I'm not as persistent as I would like to be) I found a photo on filcker with a short description. Basically, some guy was sloppy with his developing and BY MISTAKE developed his colour negative film in B&W chemistry. This turned out to be the most informative detail I could find - he confused Portra 400 with HP5+ (shot at ISO400). So there you are, it's like blind leading the blind, but the guy was lucky enough - the film developed quite well. It was downhill from there. I found on the Massive Dev Chart that HP5+ @ 400 should be developed in HC-110 (dilution B) for 5 minutes. Just to be on the safe side I gave it 5.30 - negatives are better off overexposed than underexposed. I immediately developed it and was quite disappointed when I first saw the film: it was nearly opaque - not transparent at all - but it got better when I looked at it against the light so I hung it to dry. Later on I scanned the film and found out that it produced quite decent results:
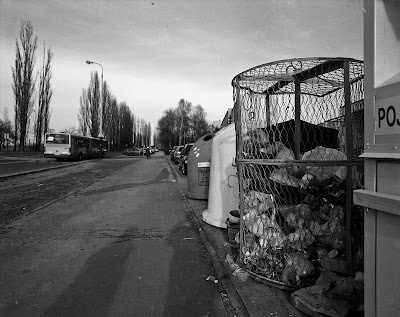
This photo is of course literally and metaphorically garbage, but you can see that there is an amazing amount of detail both in lights and darks, lots of various greys with smooth tonal transitions. Not LOMO-like at all, this is a well balanced image - I thought it would be miles behind real B&W films, but it isn't. I'm not saying that it is better or as good, but it might be useful and look qiute decent. That was all I wanted - to get rid of the dull Portra (guess it means no free Kodak merchandise for Christmas) and get some fairly decent shots with it. Let's now rewind and see how I did it, because developing was easy - scanning was a bit more tricky.
SCANNING
As I said the film comes out quite opaque. In the photo below I compared it to C41 film developed regularly, B&W film developed regularly and with slide developed regularly just to give you a poin of reference (the frames there are completely black):
The darker negative means lighter photos. I scanned a sample photo and made sure it is not in any way altered by the scanner. The result was this:
 |
| CLICK HERE FOR UNCENSORED VERSION |
Of course you can still achieve a well balanced photo out of it. It took only a few seconds and setting the scanner to AUTO to get a really satisfactory photo:
 |
| CLICK HERE FOR UNCENSORED VERSION |
Then I only had to adjust the contrast a little and crop it a bit to get rid of the frame. I'm really glad about the final product (below). I was very surprised to find that the photo has a lot of detail in both lights and shadows - and on top of that the grain is really soft and pleasant.
 |
| CLICK HERE FOR UNCENSORED VERSION |
There are a few things left. The negatives are really dark and as I said this does not make them any worse, but they are more tricky to scan - my Epson V500 was a bit lost and more often than not it couldn't find the frames, I had to do it manually. Initially I thought I would have to bleach the negative (I thought the negative was too dark to scan) so I tried it with Domestos and ACE (I think both brands are international) - I basically dipped the negatives after the whole proces of developing in a solution of one or the other. I don't remember proportions or times, but that does not matter. This proved a waste of time, maybe I didn't try hard enough. While domestos was better, it was too thick and you can see that it left a mark on the last photo in the bottom right corner. If I were to experiment with it any more I would keep trying with solutions of domestos as the only thing ACE did was dissolve the gel off the film so it flaked - the negative sample was distroyed. I also pondered using a real C-41 photographic bleach, but eventually gave up. This stuff is very expensive and this would be spoiling the whole fun of guerilla developing. Also, when zoomed in 100% the film has a tendency to look a bit like there is jpg compression - even though there isn't. I guess that is just a price you pay by violating the film like that. This is almost invisible in medium format and more annoying in 35mm film - there's more to lose - the grain is relatively bigger to the size of the whole frame and the ugly jpg artefacts too.
DEVELOPMENT TIMES
I advise you to use the times for HP5+ @ ISO400 as a rule of thumb for all C41 films. You can use it as a reference point to start from. I used it for 2 different films and it worked fine. The secret is that when you develop C-41 the regular way the development times are always the same no matter what the ISO is. So I figured out it it might be the same thing or similar with this method and I was right. I did some bracketing (-2EV, -1EV, 0, +1 EV, +2EV) and the middle frame was the most usable so this was really a well balanced exposure.
HOWEVER: There is one more thing you have to take into account. I've been talking a lot about expired film, and what you have to know about it is that as the film expires it loses sensitivity, but this is a general rule, even when you develop you films in C-41. So what I do is: When my portra is expired by let's say 1-2 years instead of shooting it at the nominal 400, I shoot it at 200.
Summing up:
PLUSES:
- cheap way to develop (especially when you have cheap expired film that you want to get rid of)
- nice tonal transitions and a creamy look
- you become a creep pervert monster hipster guru
MINUSES:
- scanning is a bit more problematic for a beginner because negatives are really dark
- when you zoom in 100% there is a jpg-compressionish look (mainly a concern in 35mm film)
OFFTOPIC: If you liked my article please take a minute to check out my wedding photography website. www.zdjeciatomka.pl Thank you :)
Some more examples from a Nikon FE10 + Nikkor 20/2.8 (Fuji Pro 160S exposed @ ISO 100):


